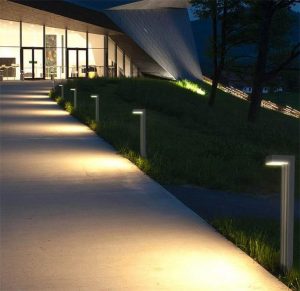
Many public places or the courtyards of private homes will install solar garden lights. So, what are the advantages and disadvantages of solar garden lights?
The advantages and disadvantages of solar garden lights
Advantages of solar garden lights
1. Green and environmental protection, high safety factor, low operating power, no safety hazards, can be recycled, and less pollution to the environment.
2. The light irradiated by the solar garden lamp is soft and not dazzling, without any light pollution, and does not produce other radiation.
3. Solar garden lights have a long service life, semiconductor chips emit light, and the cumulative life span can reach tens of thousands of hours, which is often higher than that of ordinary garden lights.
4. The use efficiency is high, it can effectively convert solar energy into light energy. Compared with ordinary lamps, efficiency is several times higher than that of ordinary lamps.
Disadvantages of solar garden lights
1. Instability
To make solar energy a continuous and stable energy source, and ultimately become an alternative energy source that can compete with conventional energy sources, it is necessary to solve the problem of energy storage, that is, to store the solar radiant energy during the sunny day as much as possible for the night or rainy days. It is used every day, but energy storage is also one of the weaker links in solar energy utilization.
2. low efficiency and high cost
Because of low efficiency and high cost, in general, the economy cannot compete with conventional energy. For a considerable period in the future, the further development of solar energy utilization is mainly restricted by the economy.
How to install solar garden lights efficiently
Installation of the battery board
Install the solar garden light to determine the inclination angle of the battery panel according to the local latitude. Use 40*40 galvanized angle steel to weld the bracket, and the bracket is fixed on the sidewall with expansion screws. Weld steel bars with a diameter of 8mm on the support, the length is 1 to 2 meters, and the support is connected to the lightning protection belt on the roof with steel bars. Punch holes in the bracket and fix the battery board on the bracket with Φ8MM or Φ6MM stainless steel screws.
Battery installation
A. First, check whether the battery packaging is damaged, and then carefully unpack the packaging to check whether the batteries are in good condition; and check the battery factory date.
B. The voltage of the battery installed is DC12V, 80AH, two of the same model and specifications are connected in series to provide a 24V power supply.
C. Put the two batteries into the buried box (type 200). After the outlet of the buried box is glued, fasten the protective tube (with steel wire water supply tube) step by step, and use silicone after the other end of the protective tube is led out. The sealant seals to prevent water ingress.
D. Digging the buried box digging size: adjacent to the courtyard lamp base, 700mm deep, 600mm long, and 550mm wide.
E. Buried tank pool: Use single brick cement to enclose the buried tank, put the buried tank with storage battery into the pool, lead out the line pipe, and cover with cement board.
F. The polarity of the mutual connection between the batteries must be correct and the connection must be very firm.
G. After the battery pack is connected, connect the positive and negative poles of the battery pack to the positive and negative poles of the power controller respectively. Then apply a layer of petroleum jelly to the joints.
Controller installation
A. The controller adopts a special controller for solar garden light power supply. When connecting the wire, first connect the battery terminal on the controller, then connect the photovoltaic panel wire, and finally connect the load terminal.
B. Be sure to pay attention to the battery. The photovoltaic panels and load + and-poles cannot be reversed, and the photovoltaic panels and battery cables cannot be short-circuited. The controller is placed in the lamp post and fixed with bolts. The upper door of the lamp post is locked.
The base of the lamp holder
Concrete pouring, marking: C20. Size: 400mm*400mm*500mm, embedded screw inspection M16mm, length 450mm, with two Φ6mm reinforcing ribs in the middle.
Laying of wires
A. All connecting wires used are pierced through pipes, and they can be led down from the roof of the building. They can be led down from the threading well, or they can be routed along with the downpipe from the floor. The roof lower line uses a 25mm threading pipe, and the underground wiring uses a 20mm threading pipe. Pipe joints, elbows, and tee joints are used for the connection of pipes and threading pipes and sealed with glue.
B. Connect with metal water supply hoses in special places to be waterproof. Most connecting wires use BVR2*2.5mm2 sheathed wire.